I get a lot of calls from people who would like to understand how to operate their water makers and would like me to come down to their boat and show them how it works. This article is intended to give you a basic understanding of water maker operations and how they work.
Reverse osmosis is when sea water passes over a membrane under high pressure. The water molecule being smaller than the salt molecule pops through the membrane leaving the salts and other minerals along with any bacteria in the sea water solution to be passed overboard as brine. Only around one percent of the water passed through the machine is used in the water making process and becomes potable water or product.
It takes a lot of energy to make fresh water and constant flow of sea water is necessary to clean the surface of the membrane, so it does not become plugged with salt and minerals. That’s why a membrane is not a filter.
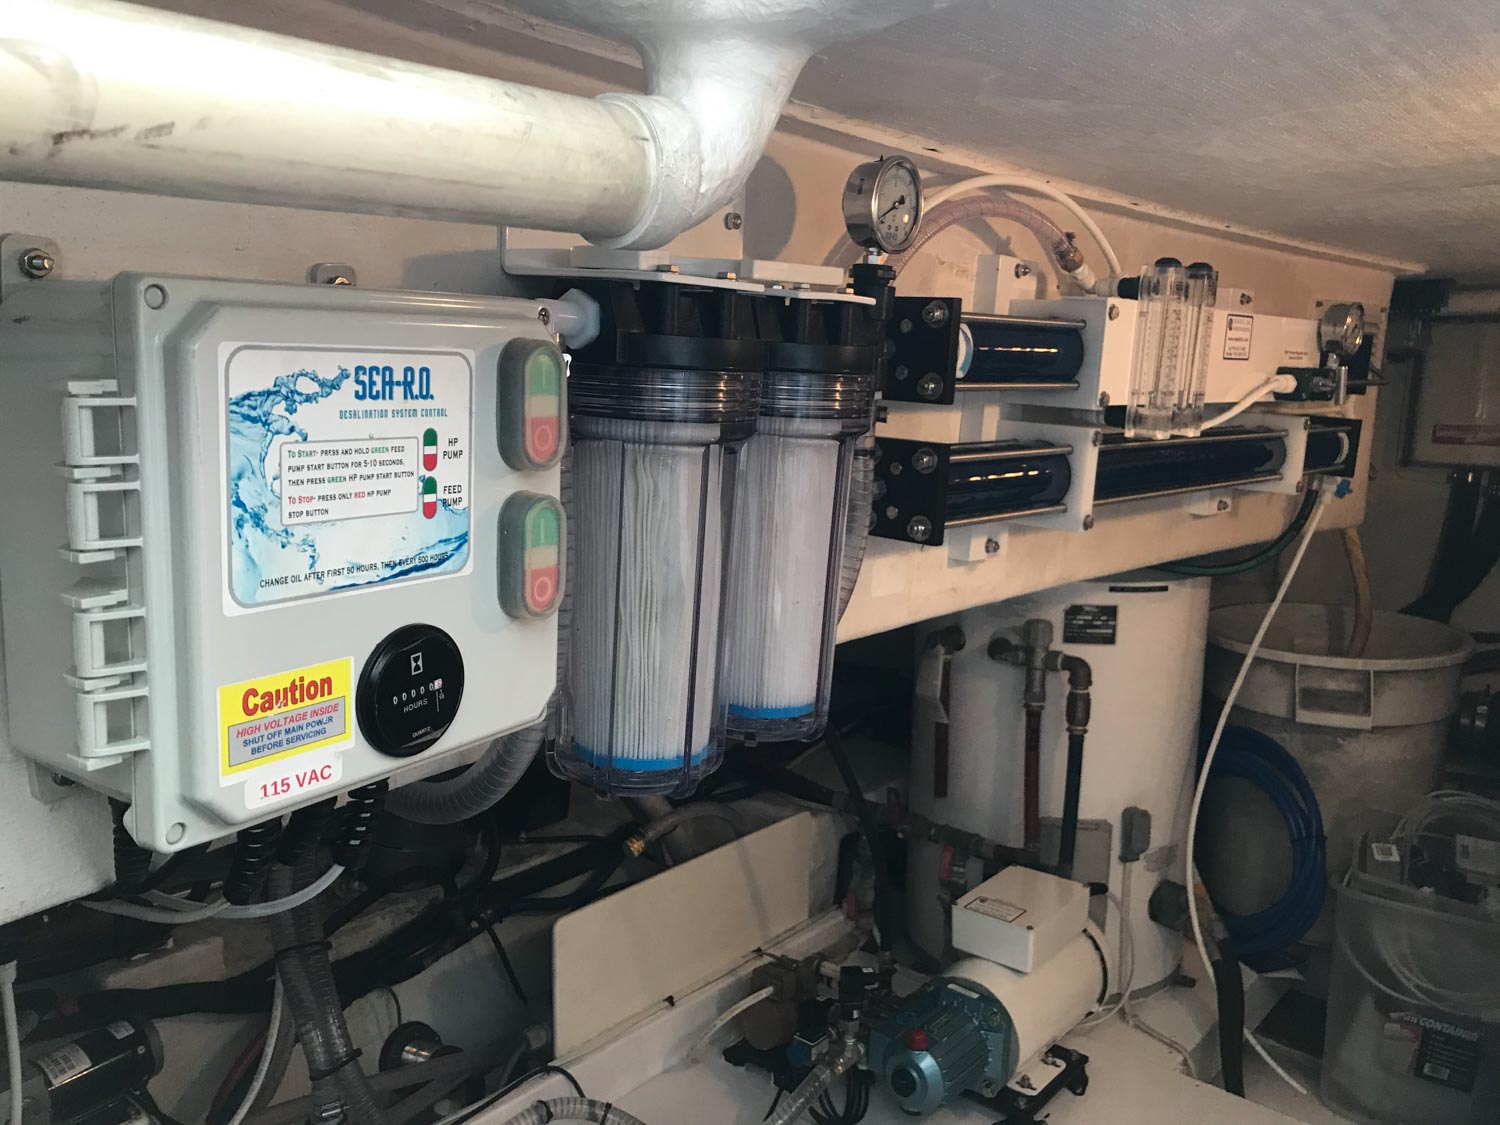
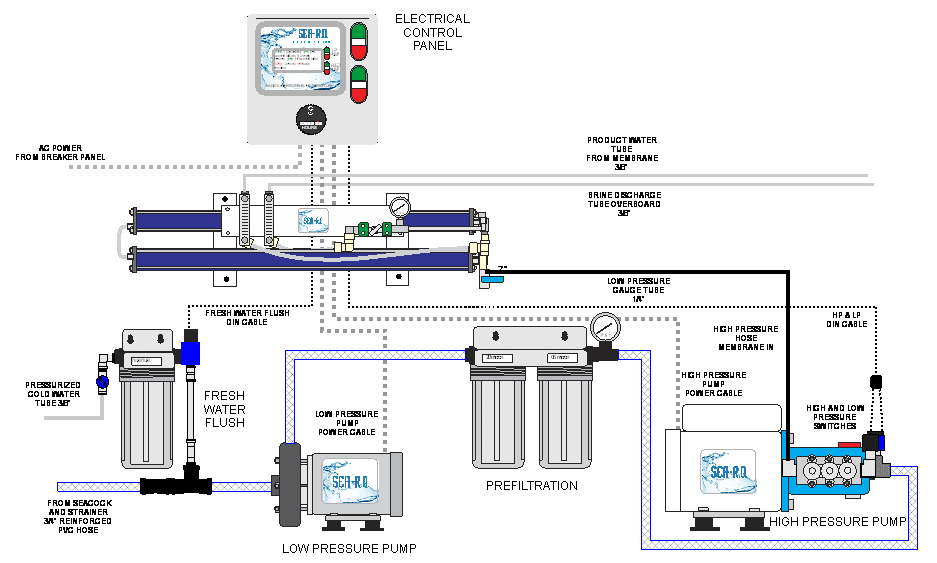
There are a lot of different brands and types of water making machines on the market. The two most common types are the High-pressure pump type; they use a high-volume pump to feed a piston driven pump. Similar to those used to pressure wash your house. The advantage is a machine that can make a lot fresh water in a short time. High pressure pump type machines use a lot of AC power and having a robust generator is often necessary.
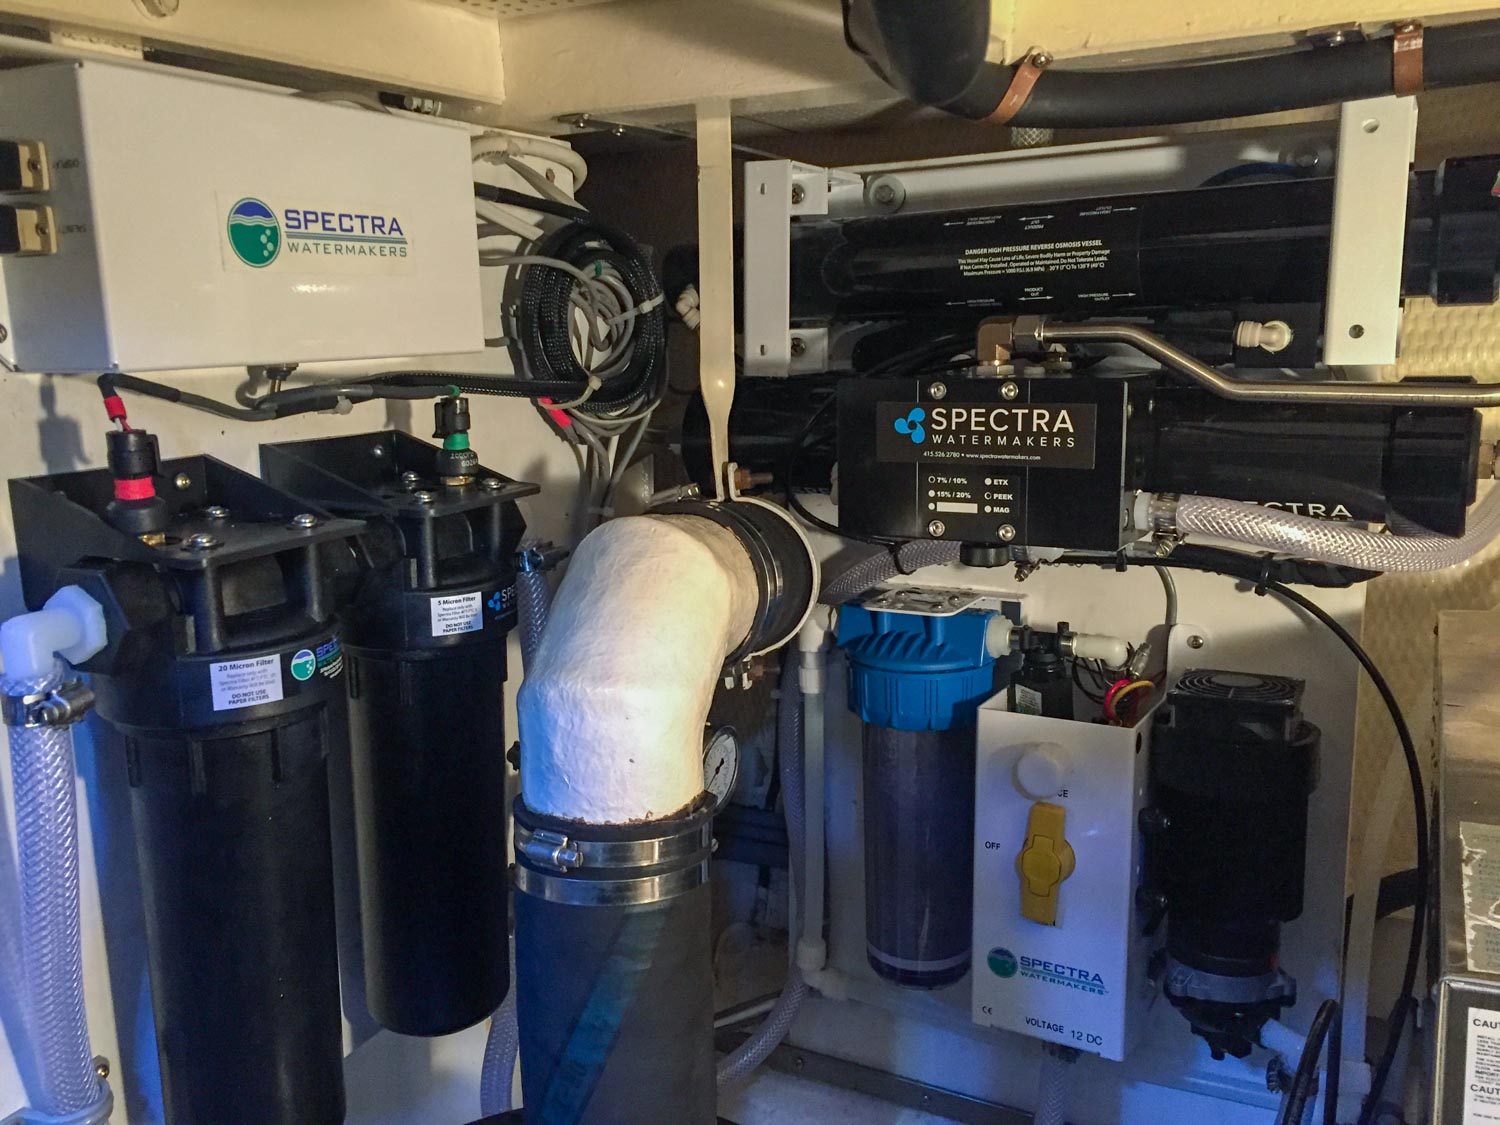
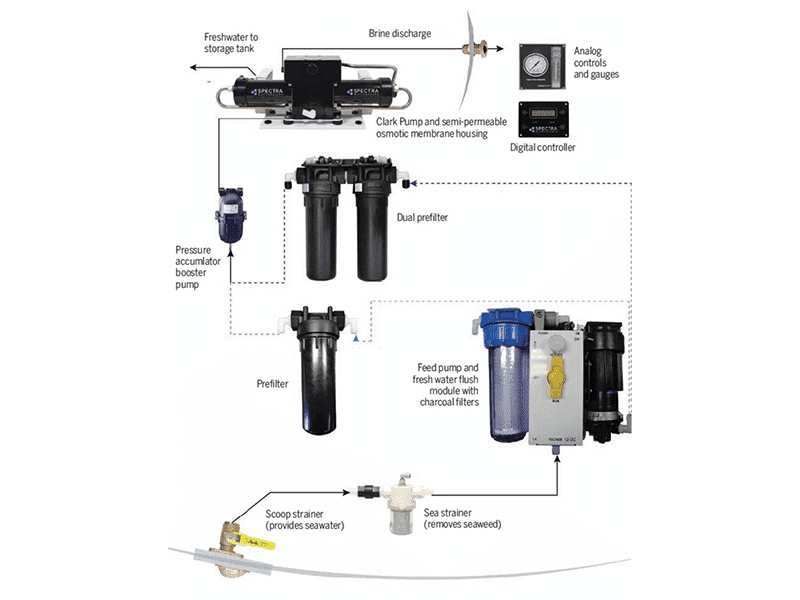
Energy recovery machines: they generally use a much smaller feed pump and pass the stored energy of the brine water back through a regenerative pump. Like in Spectra’s case, the Clark pump. They are designed to reduce the energy needed to make fresh water and usually at a lower rate of product flow per hour. Because energy recovery machines use less power to operate. They can be operated off the vessel’s existing DC power system. Energy recovery machines work really well on sail boats or vessels without a large generator.
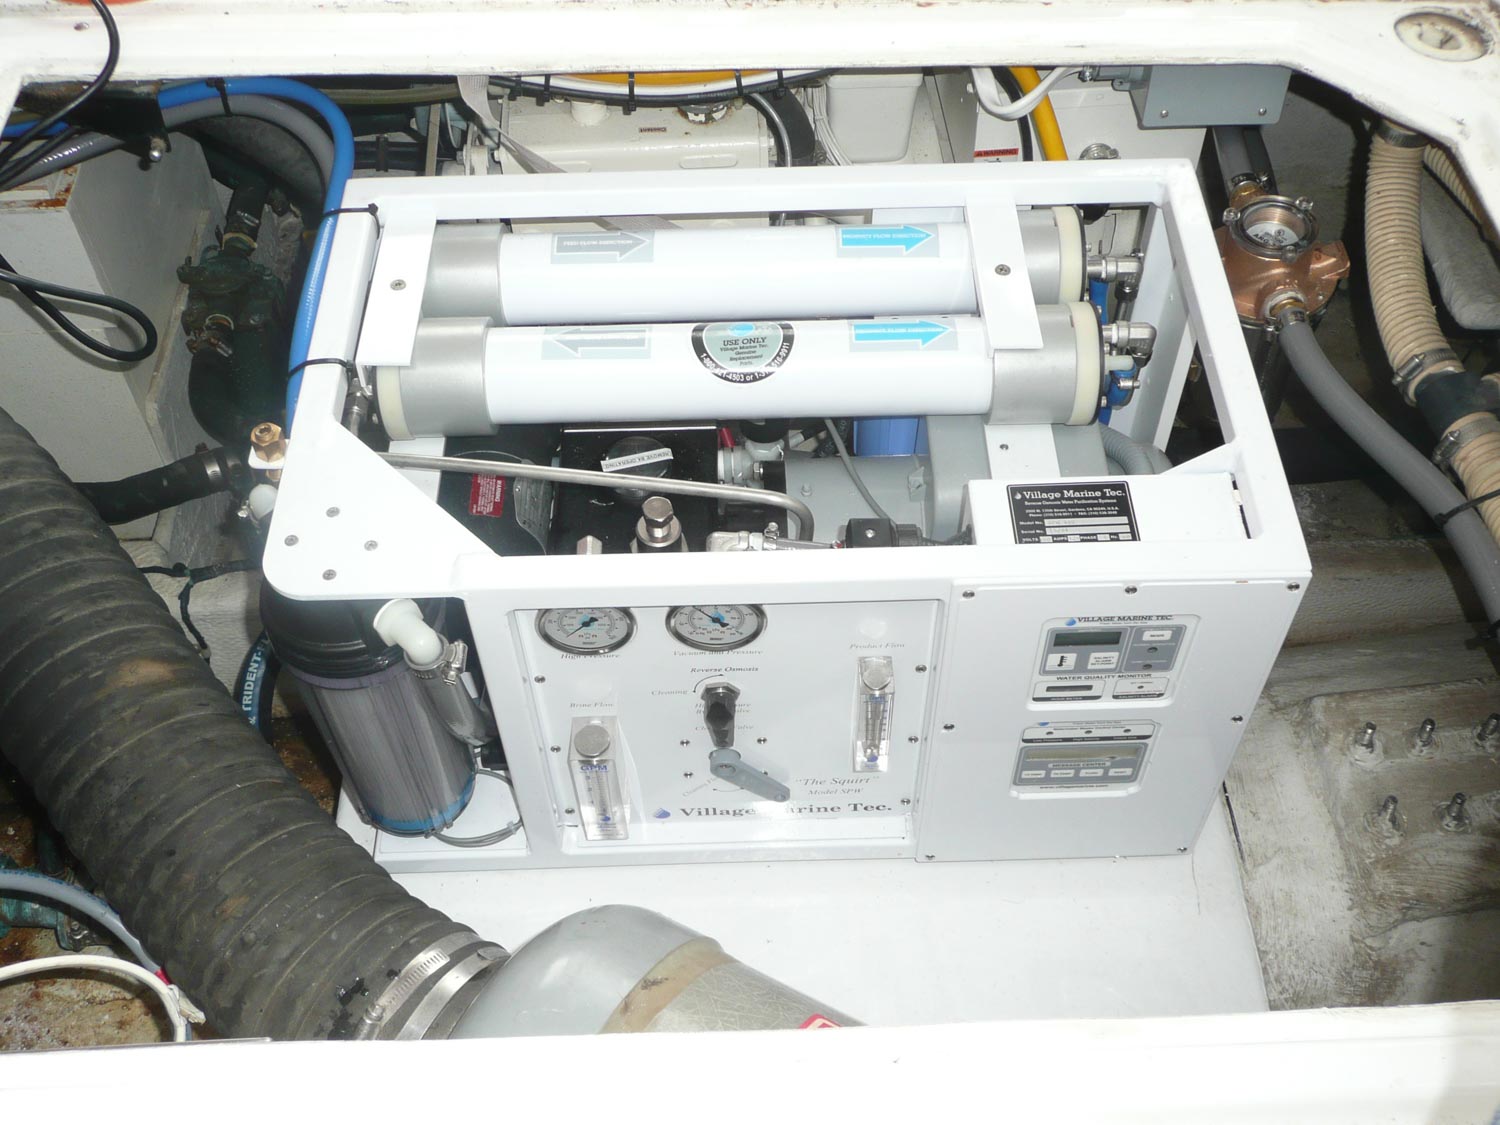
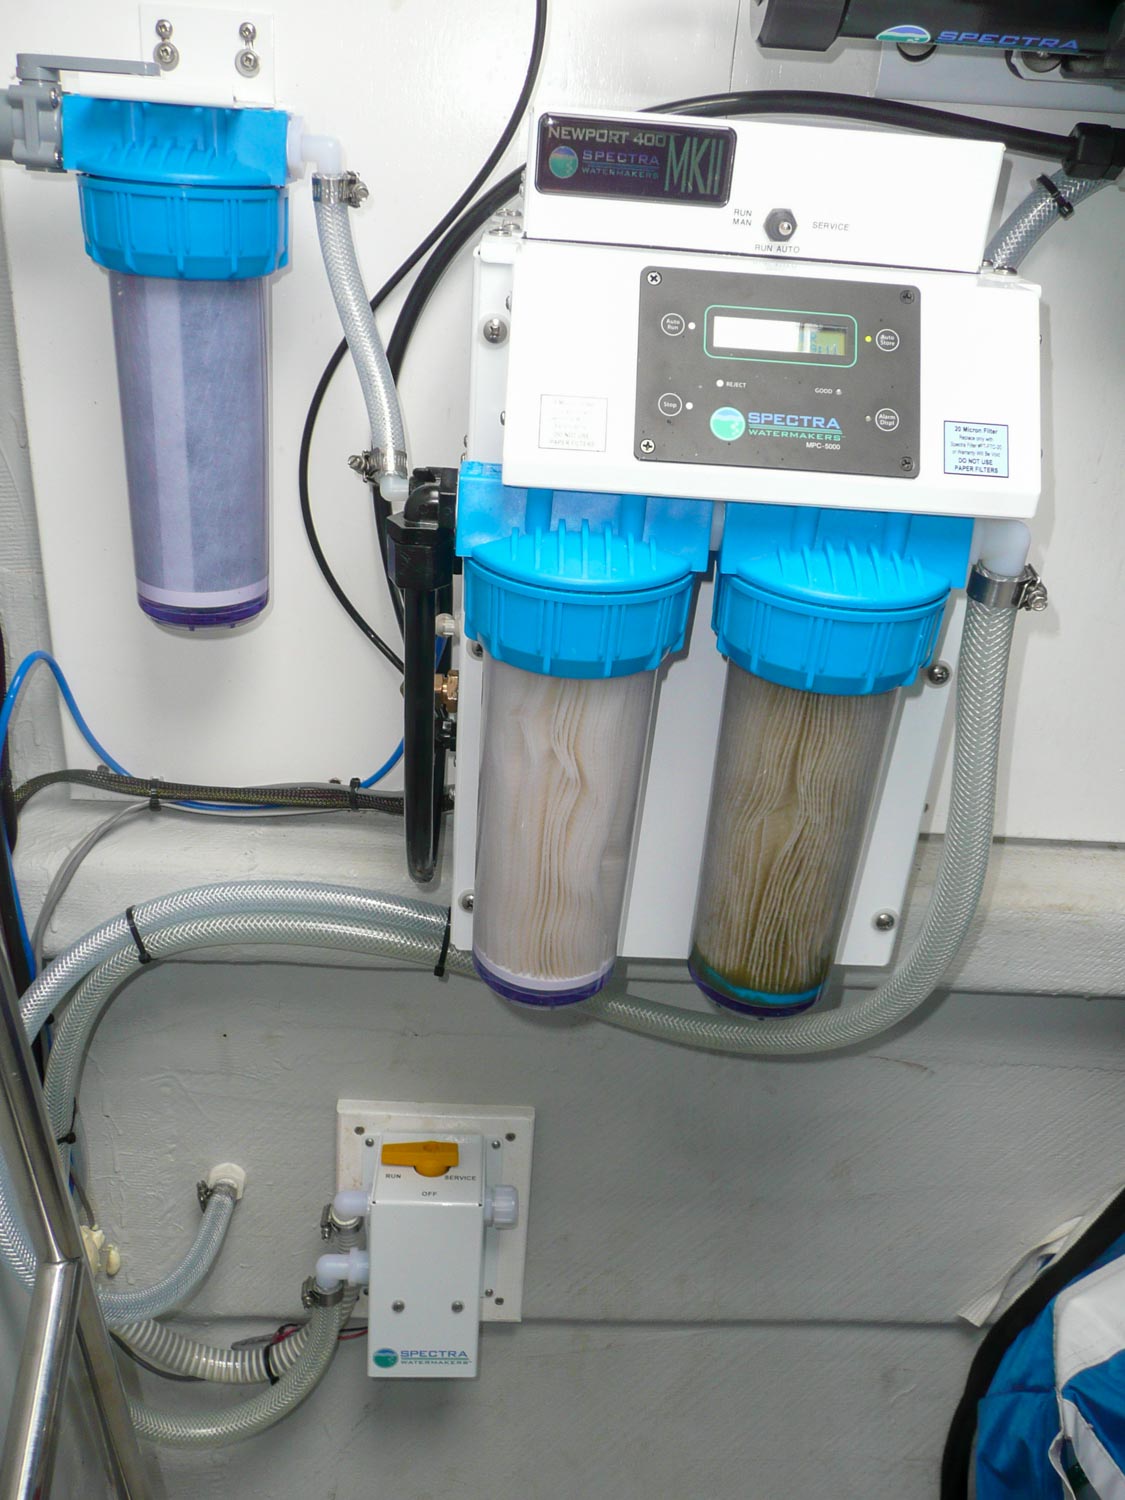
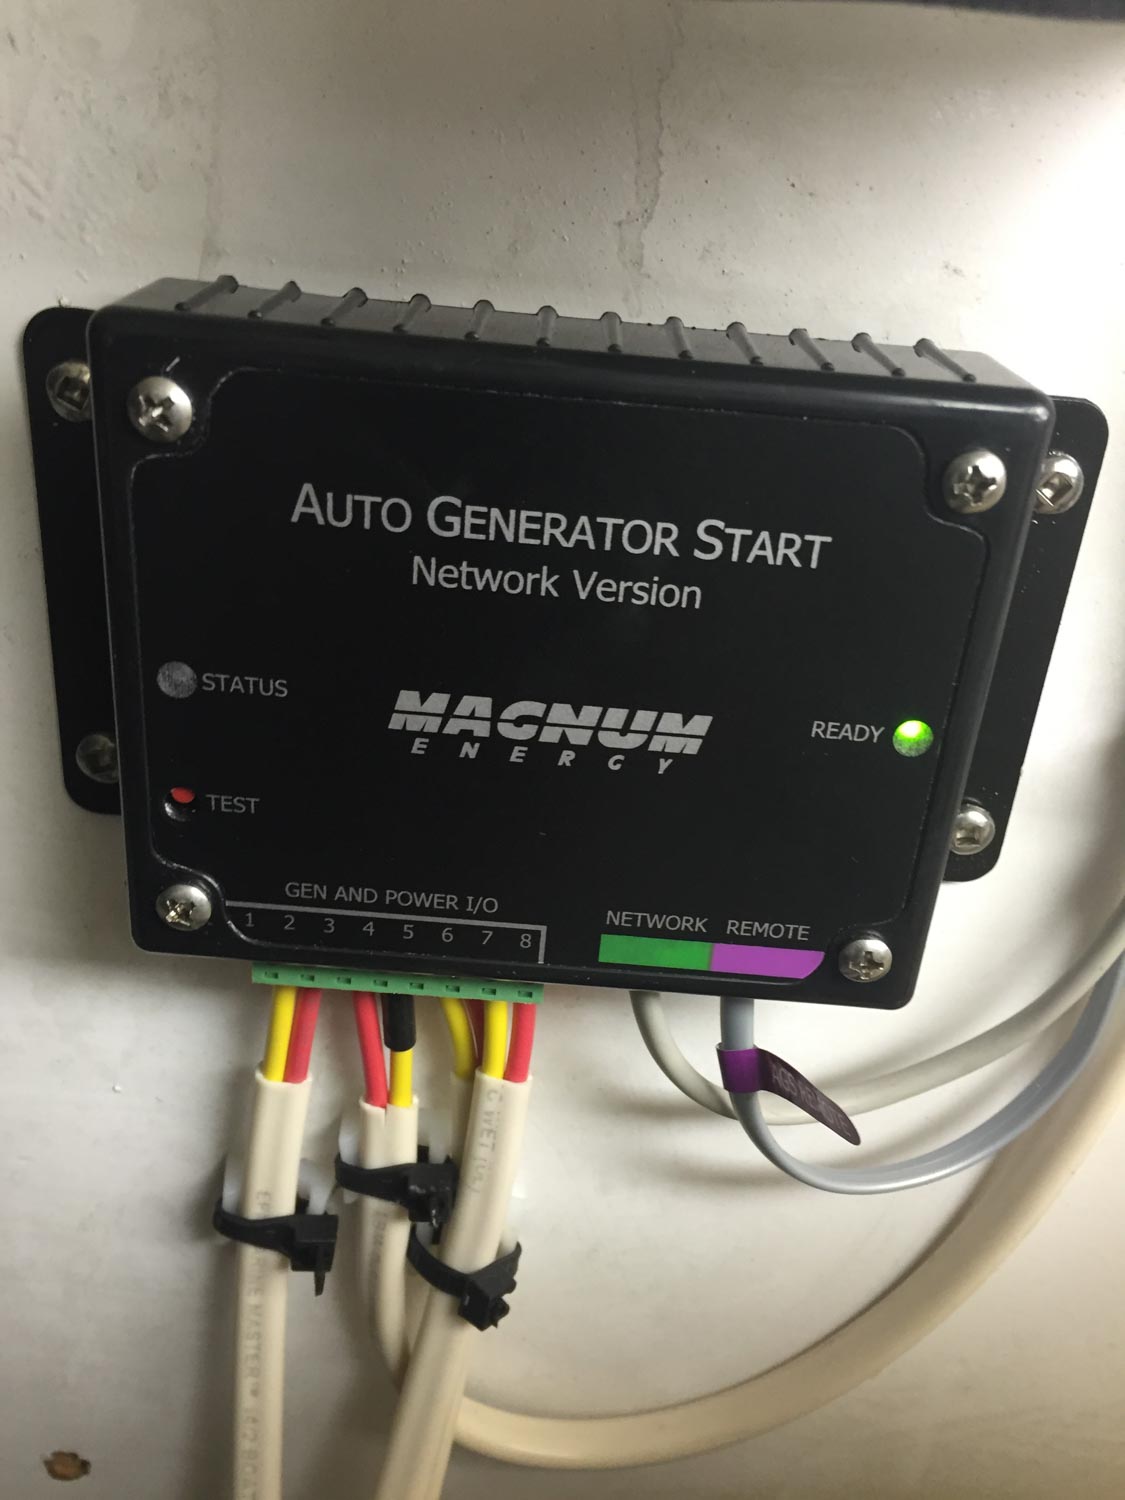
 Water makers can be simple analog machines. With the flow meters and a pressure gage controlled at the machine. Others are a lot more automated, Consisting of a remote-control panel and monitor. Remote panels can be simple on/off type. Too a full color display showing water quality in parts per million of salinity, the amount of product made, filter condition and any machine faults. They may offer programable freshwater flush intervals and more.
Words to Know
Reverse Osmosis: is the process of removing H2O from a solution of sea water.
Product: the drinking water produced by the machine.
Pickel: to store the membrane when not in use with a storage chemical.
Brine: the unused concentrated sea water sent overboard.
Pre Filter: the filter cartridges used to take the sediments and algae out of the sea water.
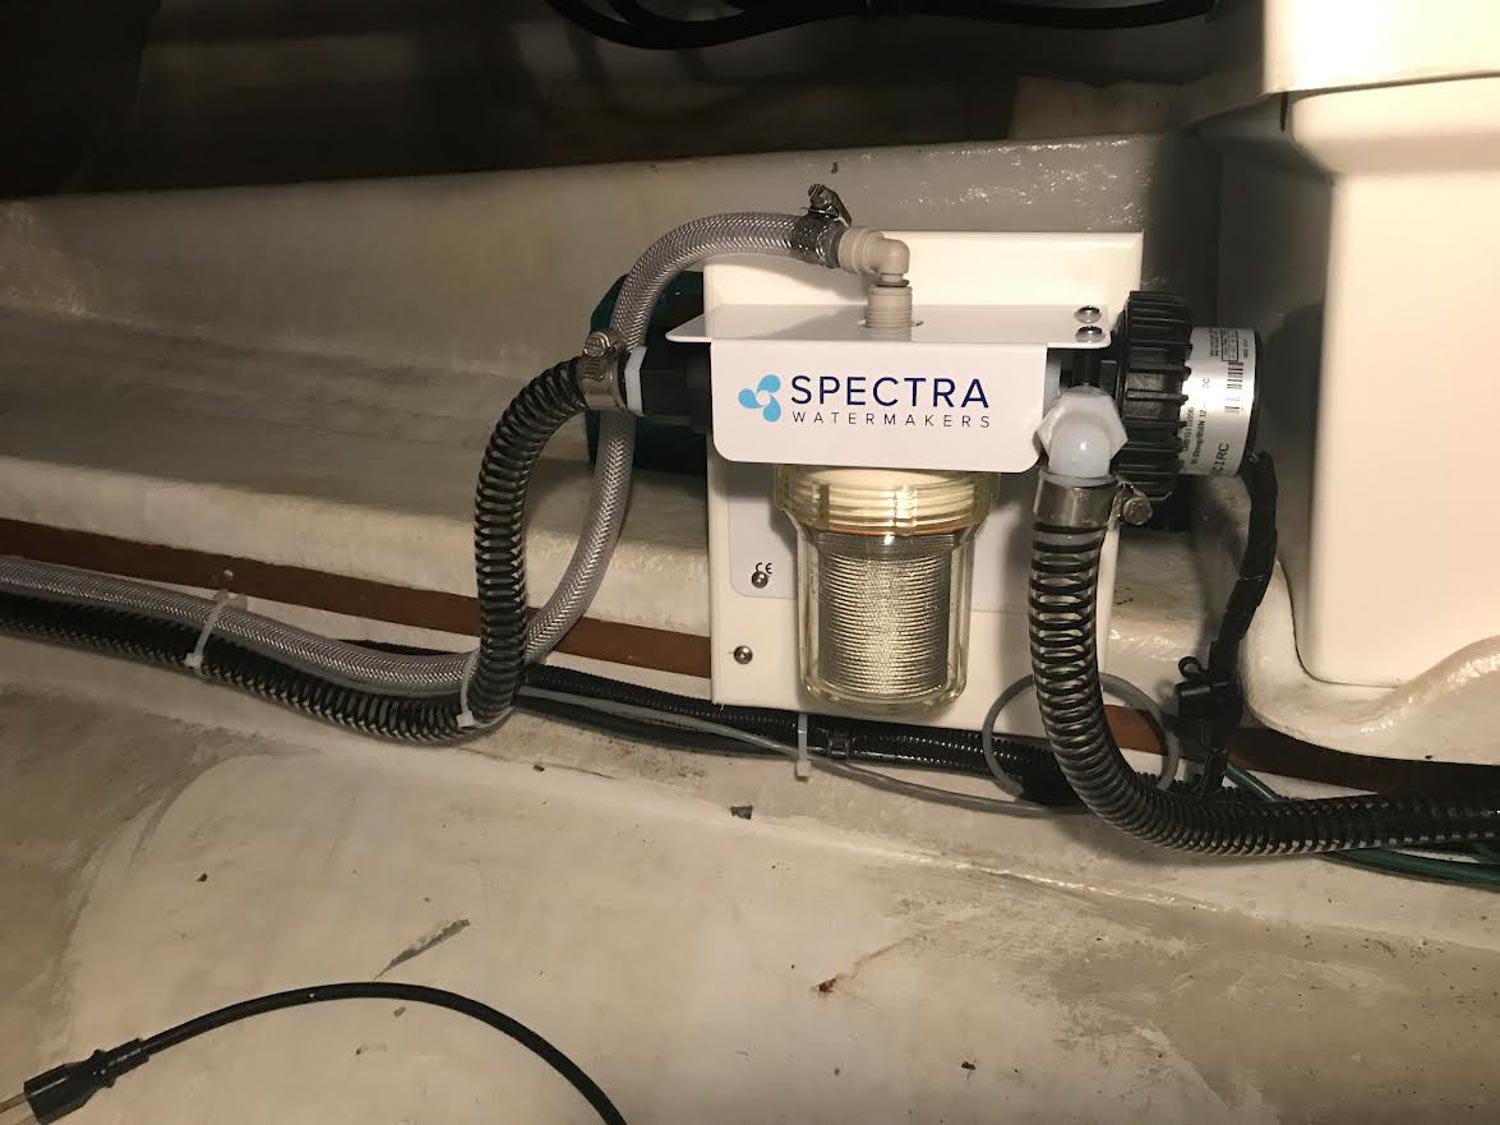
Sea strainer: to remove sea grass and large contaminants from the sea water.
Feed Pump: often a large centrifugal pump used for priming and feeding the high-pressure pump or regenerative pump.
High pressure pump: a piston driven pump capable of generating over 1000 psi.
Regenerative pump: recycles the leftover energy of the brine discharge back through the pump to make the water maker more efficient.
Membranes: Most membranes used in recreational vessels sizes will be ither 2.5” X 40” or 2.5”X21” large systems or commercial systems will use 4”X40” or larger. The size and quantity of membranes a machine has is what determines the amount of product water it can generate. Membranes can handle up to 1000 psi. Pressure over 1000 psi can damage a membrane.
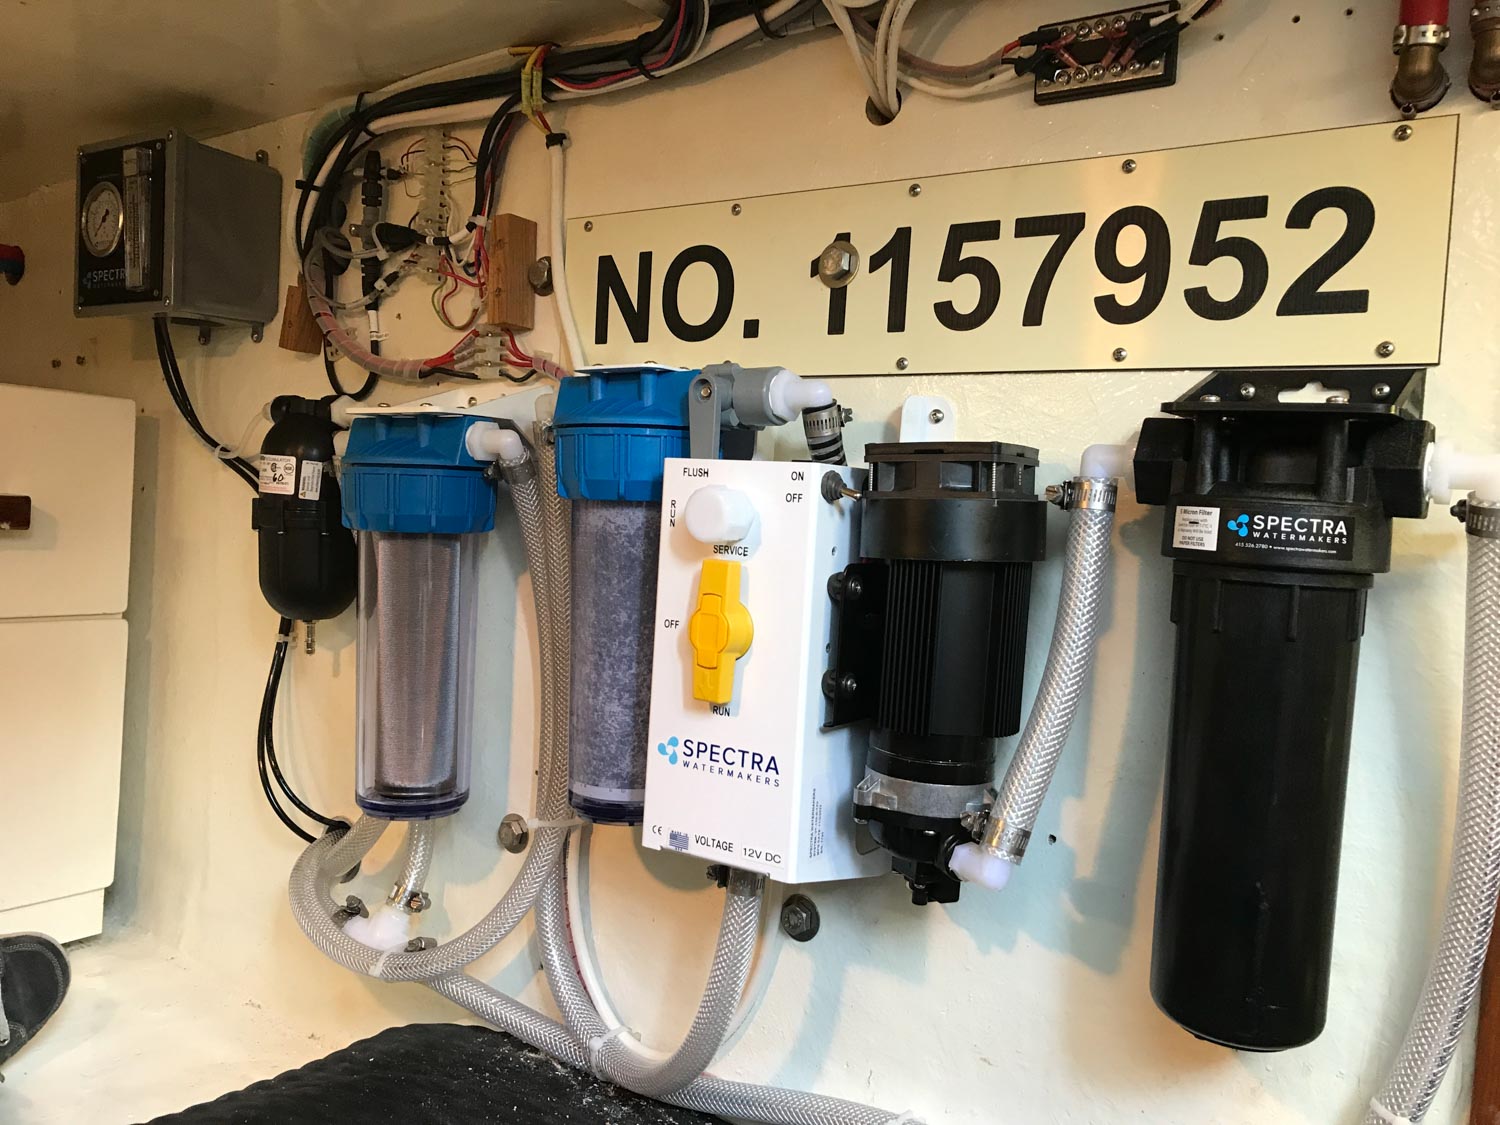
Keeping biomatter from growing on the membrane is really critical to membrane survival. Sea water contains a large amount of biomatter. Just like the bottom of a boat it is looking for a place to grow. Flushing the membrane with fresh or product water after every use is built into most automated machines. The fresh water from your tank does not contain any of the biomatter sea water does and helps retard bio growth. The flush cycle will typically use a couple of gallons of water every flush cycle. Automated machines will have an auto-flush feature and when they are turned ON, the fresh flush will use water from the freshwater tank to flush the membrane typically every 5 days. Some machines can be programed for shorter or longer intervals. It is important to leave on the domestic water system pump on for the auto flush to work. Good practice tells us to turn off the freshwater system when we leave the vessel. I often find the freshwater pump braker in the OFF position. Making the fresh water flush inoperative.
Chlorine from the freshwater tank used during the freshwater flush cycle can damage the membrane. The freshwater flush system will have a charcoal filter to remove any chlorine from the flush water. The charcoal filter will need to be changed every 6 months or whatever the manufacturer recommends. Keep an extra on board in your kit.

Parts per million: Federal standard for water purity is 800 parts per million or ppm. Cut in on most machines is around 750 ppm. At the point the machines internal switch will start to divert the product water from going overboard and start delivering product water to the freshwater tank. Water makers can achieve fresh water as low of 80 ppm more typical 100 to 250 ppm is normal and a value higher than 250 ppm may indicate that it is time to start thinking about replacing your membranes.
Membranes don’t like oil. Oil or diesel will plug a membrane. Oil floats on top of the water when installing a water maker, placing the sea water inlet as low as practical in the hull is good installation practice. Boat owners can be reluctant to run their machine in the marina. Just look out the door and make sure there is not an oil slick or diesel floating on the water and it should be OK to run the machine.
Pressure relief valve: it is really important to understand the operation of the pressure relief valve. Backing off the valve relieves pressure on the membrane and the system as a whole. Some machines will have a simple ON/OFF configuration while others will have a pressure regulator that you can dial the pressure up along with the product flow. Opening the valve is done when you are pickling and storing the water maker at the end of the year. Or when you bring it back to service for the summer, checking for leaks and purging air out of the machine. Trouble shooting a suspected bad pump is another reason to back the pressure off. Flushing the membrane of contaminants can be done at any time. If you think you may have picked up oil or the amount of product water seems a little low. Backing off the pressure is a good way to flush any contamination out of the membrane. Backing off pressure should be the default any time you think the machine is not working correctly!
Filters: Keeping the sea stainer clean and filters changed and in good condition is essential to the operation of any water-making machine. Most machines will have a 20-micron and a 5-micron filter. Having a supply of extra filters in good condition is a must. If you plan on any extended trip. If you plan on installing a water-maker an accessible location for the filters is an important consideration. Placing the filters where they can easily drain into the bilge without making a mess is always welcome.
Running a reverse Osmosis water maker: If you are buying a boat with a water maker on it or are not sure how to use a water maker. The best way to learn is just to dive in. The number one thing you will need is the manual. If you do not have the manual go to the manufactures web site and download one and print it. Place the manual on the table and go step by step. That is what I do! Next make an inventory of parts. You will need new filter cartages, charcoal filter, service hoses, a 5-gallon bucket, filter wrenches and some storage chemicals. If you don’t have these things, call the manufacturer and order them.
Next make sure your pressure relief valve is backed off. Close the thru hull, remove the sea strainer and filters with your filter wrench and throw the old filters away. The filter housings might be black and smelly. Dump everything in your bucket and take them to the dock and clean them with a bush. Replace the filter cartages on to the machine with the appropriate filters, most likely 5- and 20-micron filters. (Keep three sets on board.) (DO NOT use a pipe wrench or Channel lock pliers to remove your filters!!!)
Open the sea cock and check for leaks. It is important to make sure the pressure relief valve is open. Having it closed at this time will drive any pickling agent and biomatter into the membrane. At best it will affect the taste of the product water. Start the feed pump separately if you have that option. The pressure from the feed pump should push through the high-pressure pump and go overboard purging any air out of the system. If you cannot start feed the pump separately, that is OK. Just push the start button. Most machines make a lot of noise, that’s OK. Make yourself familiar with the way the machine sounds. And check for leaks again. If your filter-housings are dripping, tighten them a little with the wrench. If they continue to leak, buy new seals from the manufacture. A number that by now you should have stored in your phone.
Check that you have good flow over the side of the vessel from the brine discharge through hull located just above the water line. Check to see if there is any oil on the water, if so, I would not run the machine until the water is clear of oil. If the air is purged out and you have good flow through the system. Run the machine for a half an hour minimum, an hour or more is better. Remember you are flushing out the membrane of any unwanted chemicals and bio out of the membrane, checking for leaks and purging air.
If everything looks good start the high-pressure pump, again check for leaks. Start running up your pressure with the pressure regulator or in Spectra’s case just close the black knob on the Clark pump. Do not exceed 800psi of pressure to the membrane and watch the product water flow meter start to rise. Check for salinity with your salinity tester or just taste it. The built in salinity probes can become fowled and sometimes need to be taken out and cleaned or replaced. On most automated machines they do not pass the product water to the tank until the salinity probe parts per million is within spec. If you are not making the rated amount of water for the machine you may have membrane issues. There are some cleaning chemicals you can run through the machine to clean them. They will however take some life out of the membrane.
Now you are making water!
Putting the machine away for the winter: Pickling a water maker is not difficult. The manufacturers of the machines know that if you can’t wrap your head around the pickling process you will not be a happy camper. There are a lot of variations of this theme. Whatever the case, you are going to purge out the salt water and replace it with a storage chemical.
Keeping all your tools together in a 5-gallon bucket with a lid is good practice. Get your manual and follow it step by step! In essence what you are going to do is short cycle the machine through the bucket with the pickling agent in it. First thing, fill the bucket with fresh water from the water makers sampling valve or use some distilled water from the supermarket. Main thing no chlorine in water.
Next mix the storage chemical or propylene glycol if you plan on wintering the vessel in a cold climate and stir until dissolved. Then put the machine through two freshwater flush cycles. Make sure the pressure valve is open. You do not want to force the pickling agent into the membrane. Next, attach the hoses to the specified ports and turn the diversion valves to service position. Place the hoses in the bucket. You may need to hold them, so they don’t come out. Next start the machine and let it cycle until well purged.
Stop the machine, put the valves back into the run position and dump the bucket. Remove the old filter cartridge and the freshwater flush carbon cartridge and dispose of them into your bucket. Leave the seacock closed. Replace the old cartridges with new ones, leaving the filter canisters empty. Placing a note with the date and condition of the machine is good practice. Done until spring. That’s it!